You Joined As A Vendor…Now What?

Receive Your Profits or Payouts
So you’ve joined DroneStripe as a vendor* and are ready to sell your awesome footage and images. You’re probably wondering how you’ll receive all your profits!
On the DroneStripe website, we have two options for you to receive your payouts. The first one is via PayPal but we aren’t going to jump into that because it’s super straightforward!
Stripe is our second option and because it requires a few more steps, we’re going to walk you through it. This post illustrates the steps to set up a Stripe account to manage your payments.
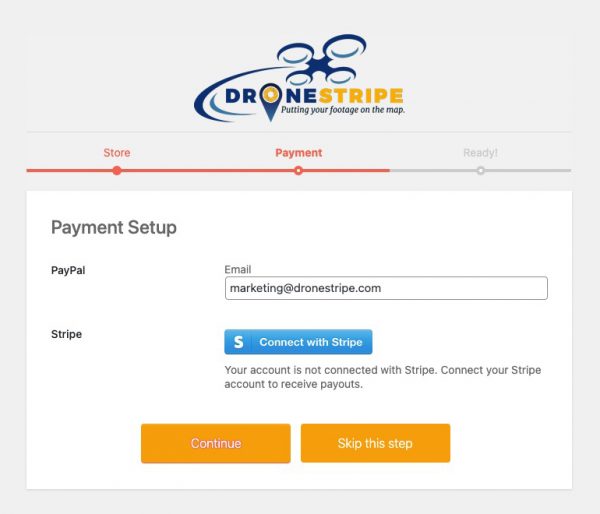
1 When you first begin your Vendor registration (after clicking the large UPLOAD button on the home page) you will be prompted with a Payment screen as seen below. Click the blue ‘Connect with Stripe’ button.
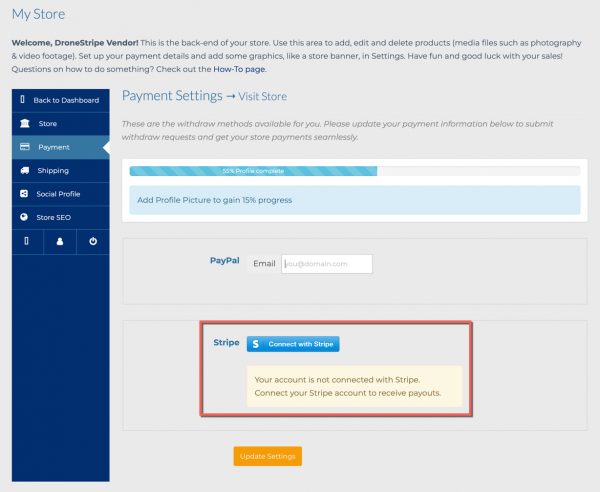
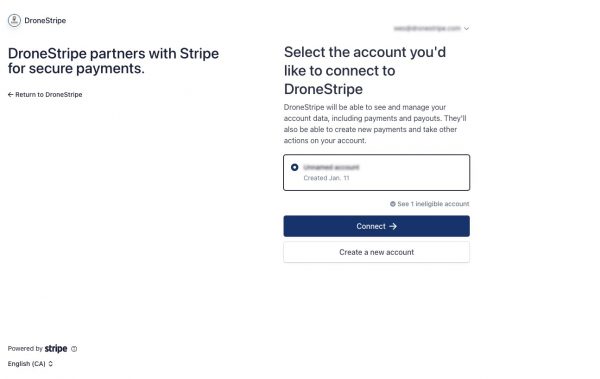
2 Once you’ve click the ‘Connect with Stripe’ button, you’ll come to a screen that looks like the screenshot below. It will auto-generate your DroneStripe associated email whether you are already a Stripe user or not, click the dark blue ‘Connect’ button to continue.
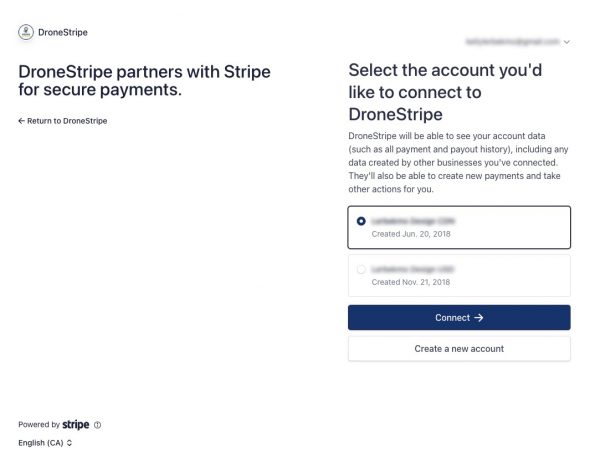
3 On the next screen, Stripe will prompt you to either login if you are a current user or ask you to create an account if you are not. Once you have logged in or created your account, you will see this screen asking you which account you want to connect. Ensure your account name is showing correctly and hit the blue connect button.
4 After hitting the blue connect button, you will be redirected back to the DroneStripe website where you will see a screen that looks like this confirming your successful Stripe connection.

Once this last step is complete, all that’s left to add are your offers and your footage for sale!
While this process may seem like a lot, we promise it’s really straightforward once you begin the process! Stripe makes the account setup really simple. We love them because they have GREAT customer service and very reasonable transaction fees. We think you’ll love them too!
If you run into any challenges or need our assistance, please reach out to us at any time! We are here to help!
*Read the difference between a member and vendor in the FAQ page.







Responses